

开篇吐槽
Halo博客相比与Hexo博客算是晚辈啦,同样区别于简单的傻瓜式建站,Hexo博客系统在面世时间,使用人数上有优势,同时有着许多教程,但面向Halo博客的教程并不多。所以需要有些人站出来分享面向Halo博客的技巧或教程。本篇直接引用了许多代码来自Sanarous大佬的文章halo 博客深度定制与美化教程(以HanShan主题为例),真的超级佩服!同时感谢主题Takagi大佬提供的主题Sakura。
准备工作
我用的是Intelli IDEA:前往官网。
也推荐使用其他支持远程链接服务器的开发软件。
或者直接用Halo后台提供的主题修改功能【外观-主题编辑】。
远程配置
- 创建一个空项目,此处名称以halo-demo为例。
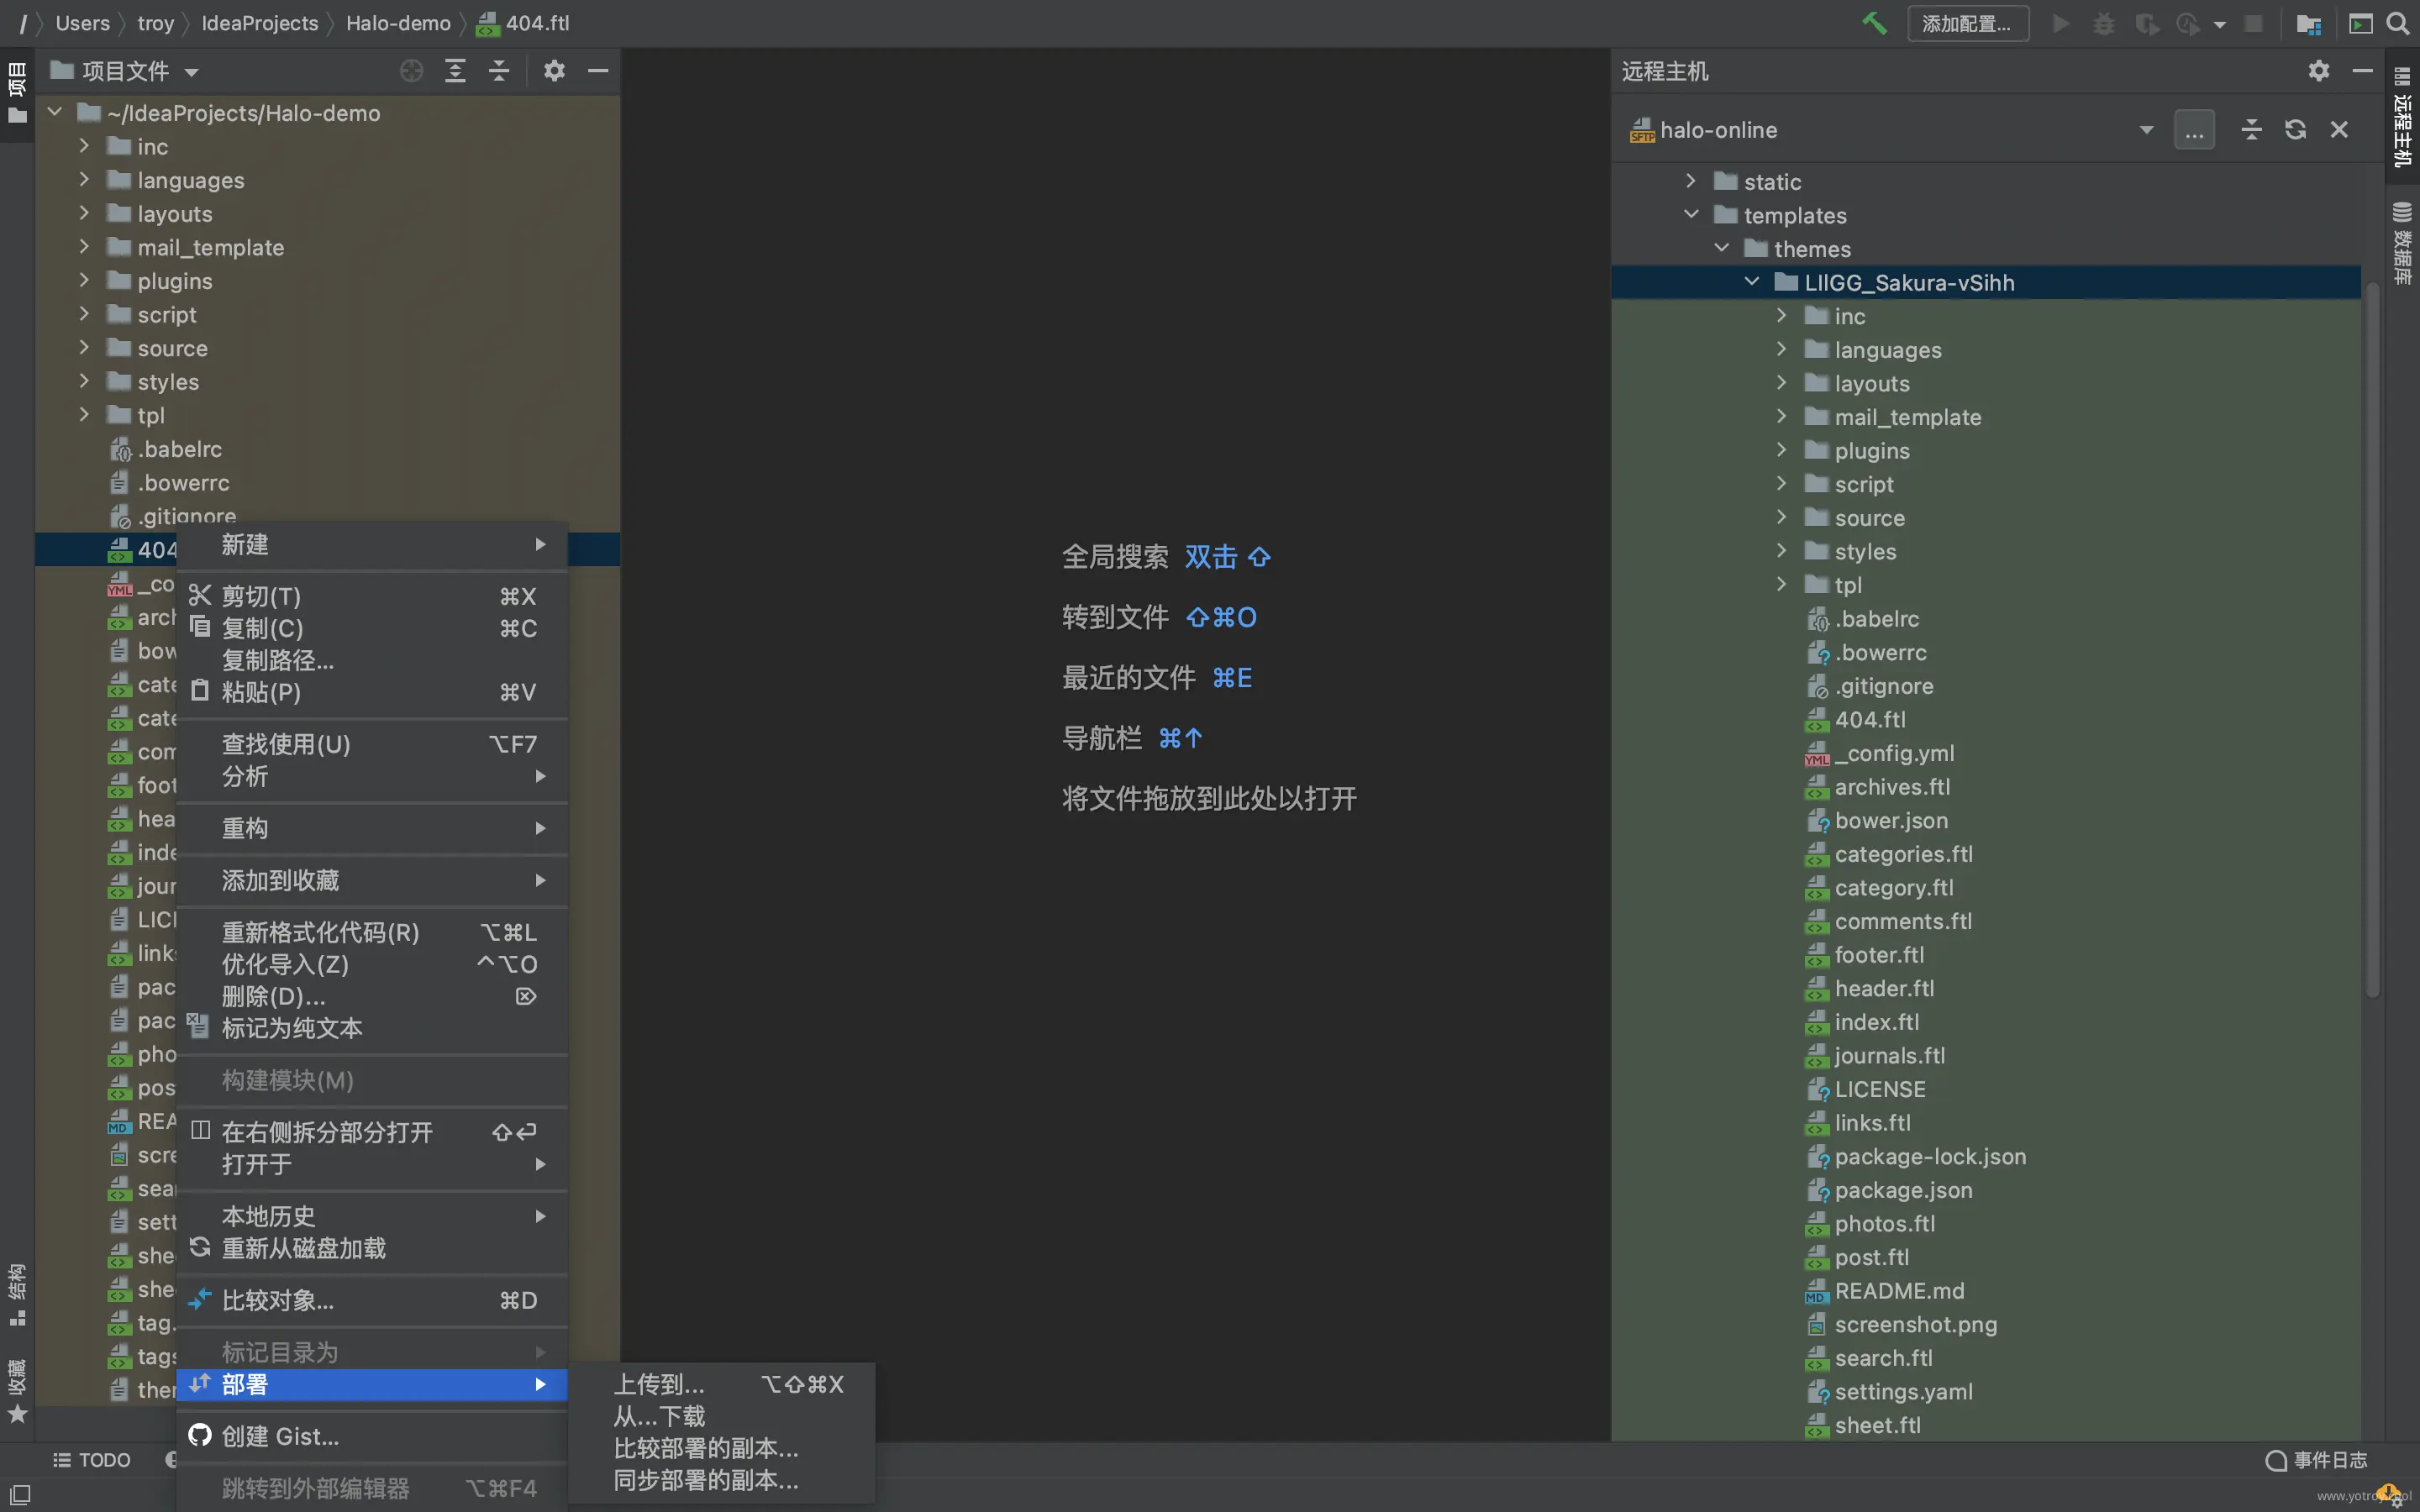
- 部署远程连接服务器。注意类型SFTP,端口一般为22。这里名称以halo-online为例。

- 部署映射路径至主题文件夹。

- 将主题内文件克隆至本地。项目内浏览项目文件如显示全则克隆成功。
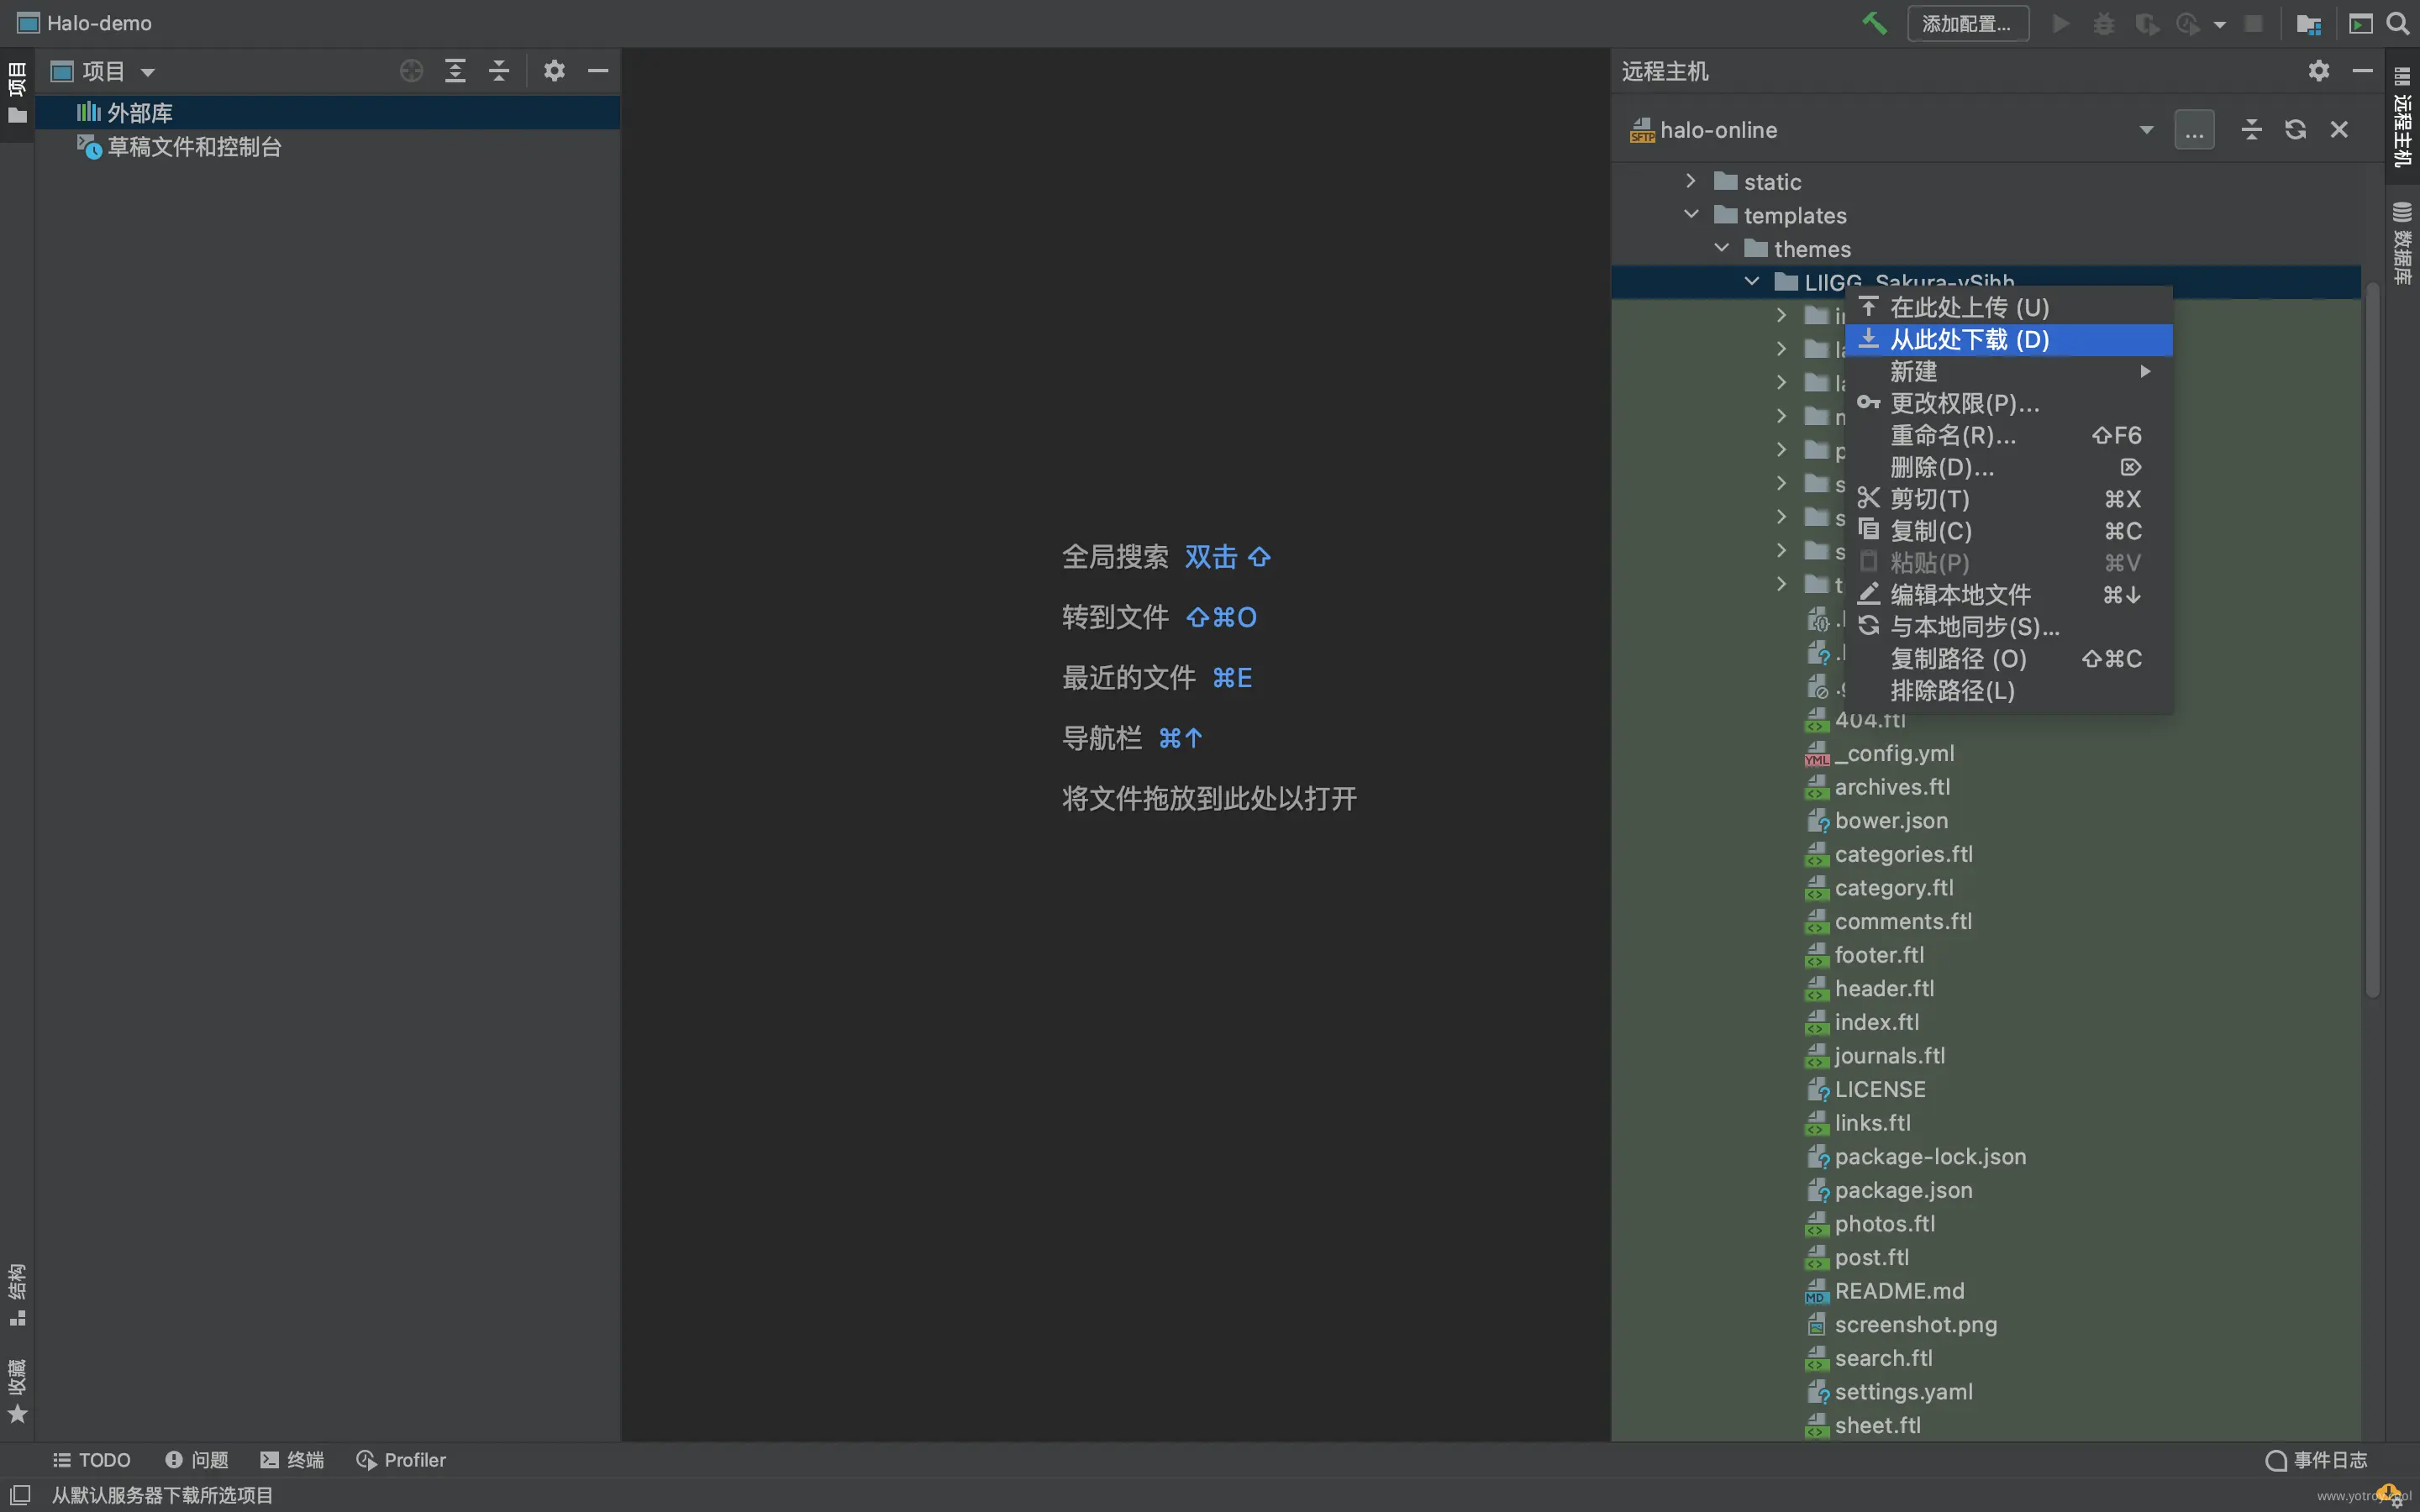
- 之后本地修改文件同步至服务器可由此修改。
美化开始
标签🏷️样式
样式如下:
这里是 info 标签样式
这里是 primary 标签样式
这里是 warning 标签样式
这里是 danger 标签样式
这段代码加入/source/css/lib.css即可。
/* note 公共样式 */
.note {
    position: relative;
    padding: 15px;
    margin-top: 10px;
    margin-bottom: 10px;
    border: initial;
    border-left: 3px solid #eee;
    background-color: #f9f9f9;
	border-radius: 3px;
	font-size: var(--content-font-size);
}

.note:not(.no-icon):before {
    position: absolute;
    font-family: FontAwesome;
    font-size: larger;
    top: 11px;
    left: 15px;
}

.note:not(.no-icon) {
    padding-left: 45px;
}

.note.info {
    background-color: #eef7fa;
	border-left-color: #428bca;
}

.note.info:not(.no-icon):before {
    content: "\f05a";
    color: #428bca;
}

.note.warning {
    background-color: #fdf8ea;
    border-left-color: #f0ad4e;
}

.note.warning:not(.no-icon):before {
    content: "\f06a";
    color: #f0ad4e;
}

.note.primary {
    background-color: #f5f0fa;
    border-left-color: #6f42c1;
}

.note.primary:not(.no-icon):before {
    content: "\f055";
    color: #6f42c1;
}

.note.danger {
    background-color: #fcf1f2;
    border-left-color: #d9534f;
}

.note.danger:not(.no-icon):before {
    content: "\f056";
    color: #d9534f;
}
在编辑文章时请使用以下html代码
<div class="note info">这里是 info 标签样式</div>

<div class="note info no-icon">这里是不带符号的 info 标签样式</div>

<div class="note primary">这里是 primary 标签样式</div>

<div class="note primary no-icon">这里是不带符号的 primary 标签样式</div>

<div class="note warning">这里是 warning 标签样式</div>

<div class="note warning no-icon">这里是不带符号的 warning 标签样式</div>

<div class="note danger">这里是 danger 标签样式</div>

<div class="note danger no-icon">这里是不带符号的 danger 标签样式</div>
添加最后编辑时间防内容过期提醒
路径/tpl/content-single.ftl,在19行插入代码。
<div class="entry-content">
<#if (.now?long-86400000*3)?number_to_datetime gte post.editTime?datetime>
<div class='note warning'>请注意,本文编写于 ${(((.now?long) - (post.createTime?long)) / 86400000)?int} 天前,最后编辑于 ${(((.now?long) - (post.editTime?long)) / 86400000)?int} 天前,内容可能已经不具有时效性,请谨慎参考。</div><hr/>
</#if>
${post.formatContent!}
<p>Q.E.D. <i class="fa fa-meetup" aria-hidden="true" style="color:#d34836"></i></p>
</div><!-- .entry-content -->
.now?long-86400000*3中3为天数,即修改距今天数大于3才会显示此提示。
文章卡片添加最近更新小图标
如图:

位于/tpl/content-thumb.ftl29行
<div class="post-date">
<i class="iconfont icon-time"></i>
<span>
<i class="i18n" data-iname="postlist.time" data-ivalue="${post.createTime?string('yyyy-MM-dd')}"></i>
<#if (.now?long-86400000*1)?number_to_datetime lte post.editTime?datetime && post.editTime?datetime gt post.createTime?datetime>
<i class="fa fa-refresh" aria-hidden="true" title="最近有更新" style="color: var(--code-toolbar-color);font-size:11px"></i>
</#if>
</span>
<#if post.topPriority?? && post.topPriority!=0> <i class="iconfont icon-hot hotpost"></i></#if>
</div>
.now?long-86400000*7里7代表文章在最近7天内有更新。
结尾
需要找准位置更新代码,之后本篇文章也会不断更新新的美化方案。再次感谢提供解决方案的大佬们。